Start by looking up your receiving address on the block explorer for the network you used. When Binance's withdrawal history says the withdrawal is complete but the MetaMask home screen doesn't show the coins, the explorer tells you whether they actually arrived: if the token is at that address, the coins are already yours and the only thing missing is the display in your wallet. Switch the wallet to the network you chose when you withdrew and turn on token autodetection; if the token still doesn't appear, add it manually with its contract address.
If the withdrawal was stopped at the submit step and the page showed an error, the coins never left, so the wallet display has nothing to do with it; go back to the Binance withdrawal page to deal with that. If the explorer doesn't show the coins at all, either the transaction is still confirming or nothing reached that address; what to do in each case is in the block explorer section.
What does a completed status in your withdrawal history mean?
The Binance Help Center article on withdrawals that haven't arrived explains that when the status column shows a withdrawal as completed, the funds have been sent out successfully. On the website you find the record like this: hover over the wallet icon, open the overview, choose the orders section on the left, then your transaction history, and pick withdrawals. For a completed withdrawal, clicking its transaction ID brings up the details of the transaction.
The article goes on to say that if the block explorer shows the transaction as confirmed, the funds have been sent, Binance can't help any further, and you should contact the owner of the receiving address or its support team. When the receiving address is your own MetaMask wallet, that owner is you, so a balance that isn't showing has to be fixed on the wallet side.
Look up the receiving address on a block explorer
The MetaMask Help Center article Why is my balance incorrect or missing a token? gives this order: check whether the transaction has confirmed, check that the wallet is on the network the transfer used, then check the balance on a block explorer. The explorer step is the clearest way to tell whether the problem is on-chain or in the wallet, so it's fine to do it first.
Copy the account address from MetaMask and paste it into the block explorer for that network: Etherscan for Ethereum mainnet, Arbiscan for Arbitrum, BscScan for BNB Smart Chain, Tronscan for TRON. Compare the balance on the explorer with what MetaMask shows. For a field-by-field guide to an explorer page, see What Is a TxID? How to Track a Crypto Transfer Like a Package.
You'll get one of these results:
- The token is at the address, in the right amount. The coins are yours and the wallet just isn't showing them; read on for switching networks and adding the token.
- The transaction is still confirming. MetaMask's explanation is that on-chain transfers are fast but not instant, so tokens that have just been sent may still be confirming. Check again once there are enough confirmations; how to count them is covered in Sent but Not Received? Check the Confirmation Count. For a transaction sent from your own wallet that stays stuck, see Transaction Pending or Failed? Why Gas Is Charged, and How to Cancel.
- Nothing has arrived at the address. Open the withdrawal's transaction ID and check whether the receiving address is the one in your wallet. If it is yours, make sure the explorer you used matches the network you chose for the withdrawal, and search again on that network's explorer. If it isn't your address, follow Sent Crypto to the Wrong Address — What Now?
Switch MetaMask to the network you chose when withdrawing
The MetaMask help page puts it in one line: “The token will only appear on the network it was sent on.”
Ethereum, BNB Smart Chain, Polygon, Arbitrum and similar networks all use the same account address in MetaMask, the one starting with 0x. Say you withdrew USDT from Binance to that 0x address over BNB Smart Chain (BEP20): the USDT is on BNB Smart Chain, and a wallet sitting on Ethereum Mainnet won't show it. Click the current network name at the top, switch to BNB Smart Chain and look again; if BNB Smart Chain isn't in your network list yet, add the network to the wallet first.
That Binance help article also points out that the receiving platform or wallet has to support both the token you're withdrawing and the network you use. TRON (TRC20) addresses have a different format from 0x addresses, so the address you receive to in your wallet has to match the network you picked for the withdrawal. USDT's networks are compared in TRC20 vs ERC20 vs BEP20 for USDT — One Guide to Settle It, and the full steps for withdrawing from Binance to your own wallet are in Your First Binance Withdrawal to a Wallet, Start to Finish.
Where to find MetaMask's token autodetection setting
MetaMask automatically shows popular ERC-20 tokens and Solana SPL tokens you hold on your account page, but it doesn't maintain an authoritative token list. Other tokens are found through enhanced token detection or added by hand; the steps are in the Help Center article How to display tokens in MetaMask.
In the browser extension:
- Click the menu in the top right and go to Settings → Assets.
- Make sure the Autodetect tokens toggle is on.
- Go back to your asset list, click the three vertical dots on the token home screen and refresh.
On mobile: tap the menu icon in the top right, go to Settings → Advanced and scroll down to the token detection toggle. For new users, this feature is on by default on EVM networks and Solana.
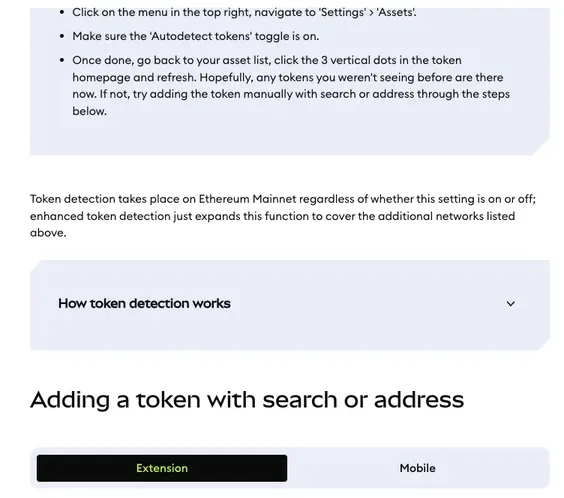
The help page splits the networks the toggle covers into two tiers:
| Network | How autodetection works |
|---|---|
| Ethereum Mainnet | Detected whether the toggle is on or off |
| Linea, Avalanche, BNB Smart Chain, Polygon, Arbitrum, Optimism, Base, zkSync, Solana, Arc | Covered by enhanced detection; the toggle has to be on |
| Any network not in the two rows above | Not covered by enhanced detection; add the token by hand as in the next section |
The detection list is compiled from several community token lists, and MetaMask doesn't keep its own list of tokens it considers valid, so being detected only means a token appears on one of those lists. Don't be in a hurry to touch airdropped tokens you don't recognize. If a trade involving one of them fails and the block explorer shows an error sending you to some website, the help page says that is very likely a phishing site; don't click the link.
Adding a token to MetaMask with its contract address
If the toggle is on, you've refreshed and the token still isn't there, add it by hand. In the extension:
- In the tokens section on the home screen, click the three dots and choose Manage tokens.
- In the list that opens, every token has a show/hide toggle next to it. The search box at the top finds tokens by name or symbol, and the network selector filters by network.
- If the token you want isn't in the list, scroll to the bottom, click Add custom token, paste the contract address, click Next, then Import.
On mobile: expand the tokens section, tap the + button, type the name or symbol into the search bar, select the token and tap Next. If it doesn't come up, switch to the Custom token tab, paste the contract address, tap Next, then Import. The help page gives EVM networks, Solana and Tron as the networks where manual adding works.
The search box is handy, but on-chain there can be several different contracts with the same name and the same symbol. So don't pick from the search results by name; go straight to Add custom token / Custom token and paste a contract address you've checked. Block explorers also offer a ready-made route: from your transaction's details, click through to the token page, click More at the top right of the profile card, choose Add token to MetaMask (Web3) and confirm in MetaMask. Besides Etherscan, explorers with a similar page design, such as BscScan, Polygonscan, Tronscan and Solscan, let you add tokens the same way.
The token shows up after adding, but the amount is wrong (0, for example). Before you change any settings, make sure your Secret Recovery Phrase is backed up somewhere safe. In the extension you can try switching to another network and back; going to Settings > Network, selecting this network and switching to another RPC URL (if it has an alternative); or closing and reopening your browser. On mobile you can likewise switch to another network and back or change the RPC URL, or hide the token and add it again with the steps above. If the token doesn't appear in the list at all, check whether you switched it off in Manage tokens at some point; turn it back on and it reappears.
Checking the USDT contract address against Tether's own page
Tether, the issuer of USDT, has a page on its site called Supported Protocols and Integration Guidelines that lists the USD₮ contracts chain by chain, with the contracts on Ethereum, Tron, Solana and other chains linking straight to the relevant block explorer. The page says USD₮ on every chain is treated the same and is interchangeable, one token on one chain being worth one on another. That is a statement about one-to-one value; it doesn't mean coins can be moved directly from one chain to another.
The chains with a USD₮ contract listed are Ethereum, Avalanche, Cosmos (via Kava), Celo, Kaia, Tron (TRC20), Liquid, Solana, Polkadot AssetHub, Tezos, Near, Ton and Aptos. On Kusama, Bitcoin Cash SLP, Omni, EOS and Algorand, Tether has stopped issuing USD₮ and no longer has any obligation to redeem it.
On that page, find the chain you chose when withdrawing and open the USD₮ contract link. Compare the full contract address on the explorer with the contract of the token in your transaction, character by character, and only copy it into MetaMask's Add custom token once they match.
BNB Smart Chain is a different story. Its entry on that page only gives the contract for XAU₮ (Tether's gold token), not USD₮, so USDT you withdrew from Binance over BEP20 can't be checked against this page. USDC on BSC is a similar case: that contract isn't on Circle's list of mainnet USDC contracts. Here the only place to start is your own withdrawal: open the transaction ID on BscScan, and the token transferred in the transaction details is the one that actually arrived. Click through to its token page to get the contract address, or use the More route from the previous section to add it directly. Don't search for another USDT by name and import that.